IoT with Balena Cloud
Today I’m going to talk about my Internet of Things (IoT) experiments using Balena Cloud. You can find my first IoT post here.
In an ideal world, a software engineer thinks no further about the deployment of their project beyond the commit of their code. While there are many continuous delivery solutions out there, I’m going to share my experience with the Balena Cloud and its 10 device free tier.
Whether developing for more traditional “embedded” projects like the Arduino or ESP platforms, or using high-level constructs to deploy to a Linux environment, it is necessary to think about software dependencies for your application. For Arduino and ESP projects, dependency management assumes that the firmware is already made available to the builder and that any scripting or tools are properly set up with any third-party dependencies to complete the build and generate the firmware to flash to the device. The flexibility of the chosen hardware platform is constrained by the features of the device and the development environment, even though you can do a lot with the right knowledge of the platform. In fact, I’m old enough to be astounded with the capabilities of things so tiny. Deployments to Linux environments like the Raspberry Pi is analogous because you will need to pick the kernel that runs on your device and then manage the operating system functions and packages that give you more flexibility but still provide low-level GPIO interfaces for physical computing. It doesn’t take long as a hobbyist to realize that some discipline is needed to manage the setup of more than a single device. It quickly becomes a challenge, especially if a durable prototype is built and the process to get it working is lost to the sands of time.
Learning from Failure
In as much as source control helps keep track of software change, there’s still the challenge of making devices as interchangeable as possible. It might be that your application as a vertical scaling need, necessitating different hardware or even platform. Another is inevitable hardware failure, resulting in frustration ![]() if a small (or large) configuration change is lost or, worse yet, an impactful availability event to your home automation
if a small (or large) configuration change is lost or, worse yet, an impactful availability event to your home automation ![]() . I accepted early on that:
. I accepted early on that:
- I will eventually lose track of any manual changes to my devices.
- I will eventually lose track of what is on my devices if the number of devices is greater than 1.
- I want to spend the minimum possible amount of time getting a new device working for my project, either for hardware failures or horizontal scaling.
- I also learned early that any manual interaction should be limited to process gaps that I intend to close or for deep dives like kernel messages from
dmesgto investigate device driver or power supply stability issues. What I’m saying here is that the physical hardware should be treated as a disposable appliance with little to no direct interaction from me unless something is wrong.
For a project based on numerous Raspberry Pi devices, an old friend of mine Marc Brooker suggested that I evaluate Balena Cloud when I was talking about my growing fleet to host components of my home automation project (I will discuss this progressively in upcoming posts). This gave me the opportunity to take some fledging Python-based projects and start to form an opinion about how to containerize them and take advantage of the deployment mechanisms offered by Balena.
Balena Cloud
Balena offers a comprehensive getting started guide for a wide combination of computing platforms and programming languages, not limited to my use of “Py on Pi”. Before we move on to how I made use of it, I recommend reading the Balena Primer on how their architecture works. Your choice of device will dictate which Balena OS distribution is downloaded for your device. You’ll notice that the OS download links provided make API calls to Balena in order to conveniently provide an image that also includes the unique service credentials to authenticate your device to the cloud service. Balena have created an excellent SD-card management tool called Etcher to write operating system images. Chances are you have already used it with no relation to Balena Cloud. On first boot, your device will check-in with Balena, appearing as a new friendly-random name which you can change and is now ready to download your project containers. It is now visible on the associated fleet dashboard which includes management functions like periodic updates of Balena OS without re-provisioning your device and device-specific management functions.
When creating a Fleet to which your device belongs in Balena Cloud, you’ll receive a git remote path that, when you push to it from you project, will trigger a Balena git-hook which initiates the server-side container-build of your project and then commit that to the Balena container registry with an internal revision number for release. At this point, your container will automatically start downloading to all devices associated with that Fleet. The Balena builder also creates change deltas for each build which means that only the difference between releases is deployed to the device. Depending on how your Dockerfile layers are created this is a significant saving relative to the full project image.
At this point, we can focus on the project implementation because all deployments require nothing more than a git push.
The Project
Now finally onto the problem being solved by my project. I wanted to build a solution for some home security enhancements, in particular the ability to take inputs from a set of passive infrared sensor (PIR) devices and also drive physical outputs like relay-boards that activate other electronics.
The plan was to be able to receive PIR events and then use software to suppress false-positives which tend to be common with PIRs in the real-world. Some PIRs come with basic trigger thresholds before sending the signal but I found that this was still not as robust as what could be achieved in software. Then, on command, the same device could send output signals based on the filtered inputs (and other decisions which I’ll discuss in future posts).
The Hardware
Here are the parts that I decided to use. I found an excellent supplier of GPIO shield/hats for my purpose from AB Electronics, UK. I set up a Raspberry Pi development board, with a stack comprising an ADC and IO port expander.
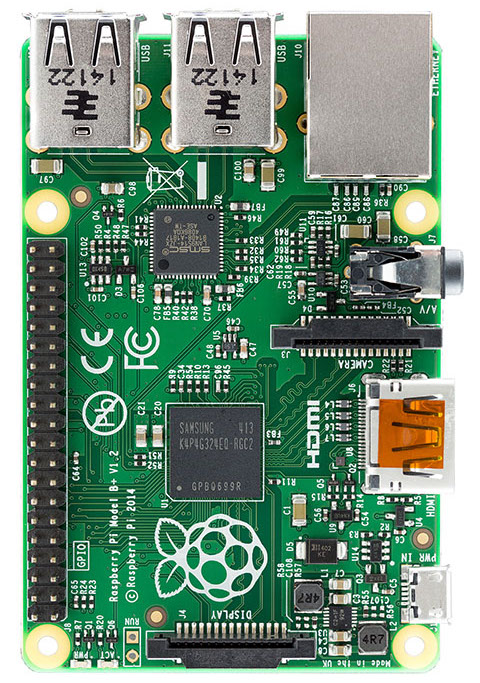
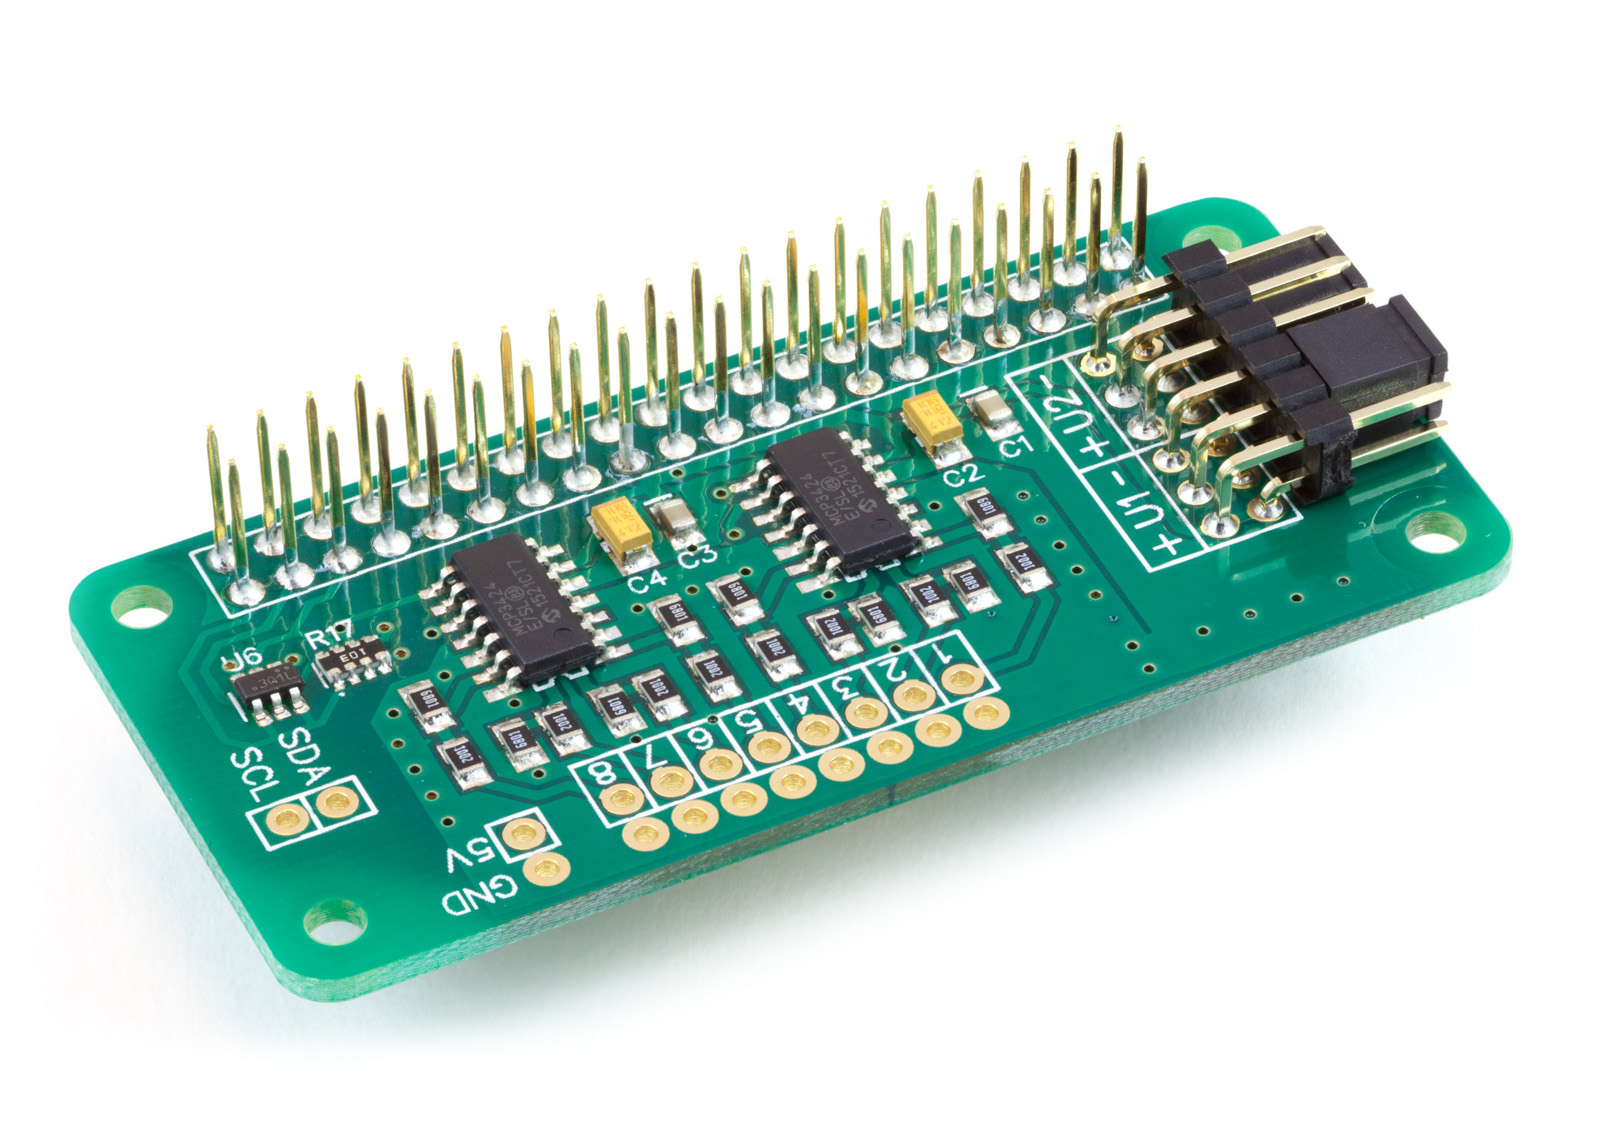
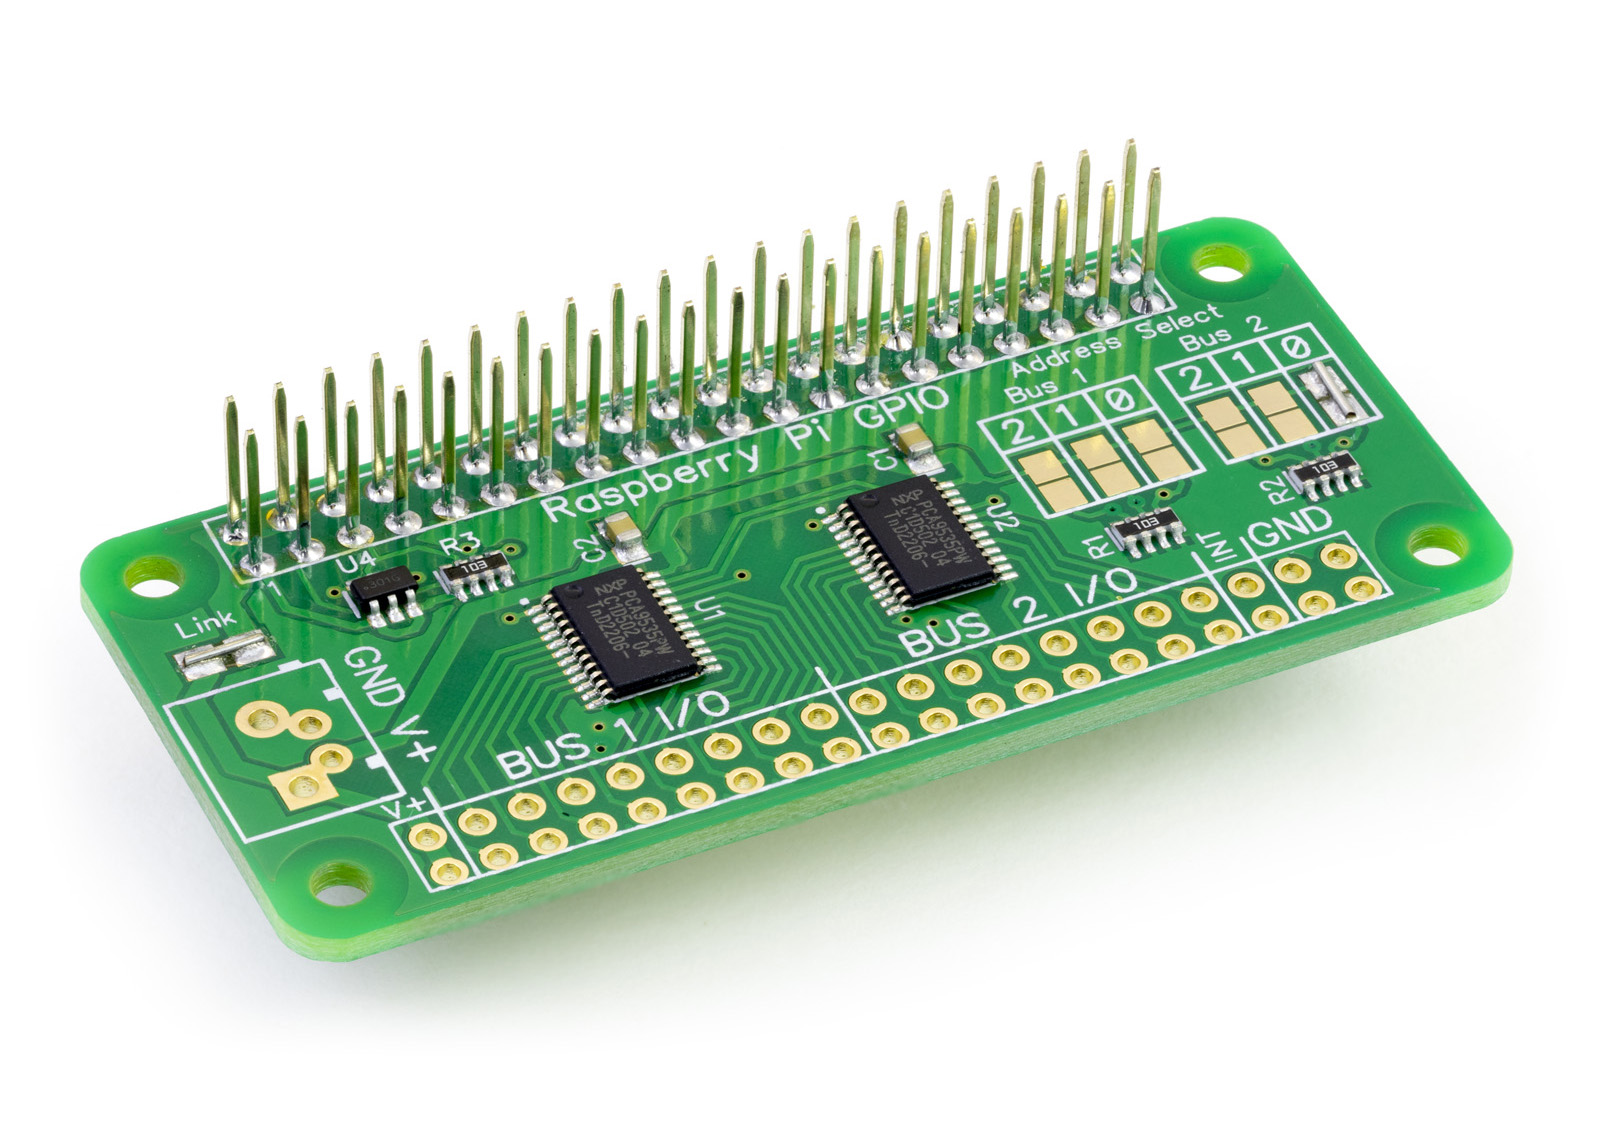
Not pictured here are the PIR input devices or the relay boards for outputs, but there are many examples of these online, and are usually designed to work with this type of hardware.
The Software
Now onto my project code. I created a project called Remote Monitor that hosts this project. Here is the basic layout:
My project Dockerfile starts with this Balena-standard syntax to reference the appropriate guest operating system image:
FROM balenalib/raspberry-pi-alpine-python:latest-latest-run
Next, some project-specific OS dependencies are installed, including Supervisor for application process control. The rest of the Dockerfile is responsible for setting up the project environment such as application working directory and crontab for job scheduling. The Dockerfile determines what happens at build time, the entrypoint script determines what happens at run time. This project entrypoint will configure rsyslog before it is started by Supervisor and generates both the application and Supervisor runtime configuration. With a few permissions needed to interact with the GPIO device handles, some special syntax at the end of the entrypoint spawns supervisord running a non-root user as a general best practice. The use of exec means that the entrypoint execution context is replaced by the application, meaning that it is no longer running, leaving only supervisor as the process-root with the configured applications as process children.
exec su-exec app env supervisord -n -c /opt/app/supervisord.confThe project README continues with a breakdown of the Python application and how it works.